Contents:
- What Is Hair Plopping and Why It Works
- Materials Needed for Plopping
- The Microfibre Towel (Best Option)
- The T-Shirt Method (Free/Cheapest)
- Turbie Twist or Similar (Budget Option)
- Step-by-Step: How to Plop Curly Hair Correctly
- Step 1: Apply Products to Soaking-Wet Hair
- Step 2: Prepare Your Plopping Fabric
- Step 3: The Head-Flip and Wrap
- Step 4: Sit and Wait
- Step 5: Unwrap Gently
- Step 6: Air-Dry or Diffuse
- Common Mistakes When Plopping
- Mistake 1: Plopping Damp Hair (Not Wet)
- Mistake 2: Plopping Too Long
- Mistake 3: Plopping Too Tightly
- Mistake 4: Using Regular Towels
- Regional Variations in Plopping Practice
- Plopping vs. Other Drying Methods: Comparison
- Plopping (10–20 minutes active wrapping, then air-dry or diffuse)
- Towel Rubbing (Traditional Method)
- T-Shirt Scrunching (No Wrapping, Just Squeezing)
- Blow-Drying with Diffuser (Fast Option)
- A Reader’s Journey
- Combining Plopping with Other Curly-Hair Techniques
- Finger Coiling Before Plopping
- Praying Hands Method Before Plopping
- Plopping Twice
- Maintaining Your Plopping Fabric
- FAQ
- How long should you plop curly hair?
- Can you plop for too long?
- Do you plop before or after leaving-in conditioner?
- Is plopping necessary or optional?
- Can you plop straight hair?
- Your Plopping Routine
Plopping is the most effective way to dry curly hair without frizz. Instead of rubbing hair with a towel (which roughens the cuticle and destroys curl definition), you wrap hair gently in fabric and let it absorb water while your curls dry undisturbed. Most people spend years rubbing curls dry, then wonder why their hair looks frizzy and undefined. Switch to plopping and definition improves within the first wash.
What Is Hair Plopping and Why It Works
How to plop curly hair begins with understanding the mechanism. Regular towel-drying creates friction that causes frizz and breaks curl clumps apart. Plopping uses absorption (not friction) and gravity to remove excess water while curls set. Wrapped gently in soft fabric, your curl patterns develop undisturbed. Water drains downward; hair sits undisturbed in that direction. When you unwrap, curls are already partially dry and fully formed.
The magic ingredient: microfibre towels or cotton t-shirts that absorb water fast without creating friction. Regular cotton towels work but slower. Microfibre is superior because it absorbs 2–3 times faster, letting you plop for shorter periods and still achieve dryness.
Materials Needed for Plopping
The Microfibre Towel (Best Option)
Microfibre hair wraps cost £3–8 and are purpose-designed for plopping. They’re lightweight, super-absorbent, and specifically shaped with elastic to secure around your head comfortably. Budget brands (Boots, Superdrug, £3–5) work perfectly. Premium brands offer minimal advantage. You need only one; they last 2–3 years with normal washing.
The T-Shirt Method (Free/Cheapest)
An old cotton t-shirt works excellently for plopping. Use a soft, worn t-shirt (new cotton is stiffer). Pilling and old stains don’t matter since it’s dedicated to hair use. This costs nothing if you have spare t-shirts, making it the most budget-friendly option. Results equal microfibre towels for most people.
Turbie Twist or Similar (Budget Option)
Single-use microfibre wraps with elastic buttons (£4–6) are convenient but less durable than reusable microfibre towels. They’re fine for starting, but if you plop regularly, a standard microfibre towel offers better value long-term.
Step-by-Step: How to Plop Curly Hair Correctly
Step 1: Apply Products to Soaking-Wet Hair
After shampooing, apply your curl-defining products (creams, gels, leave-in conditioner) to hair dripping wet. The water is essential; it activates the curl and allows products to distribute evenly. Never plop dry hair—water is what sets the curl pattern.
Step 2: Prepare Your Plopping Fabric
Lay your microfibre towel or t-shirt on a flat surface. If using a t-shirt, fold it into a rough rectangle. You want something large enough to wrap around your head.
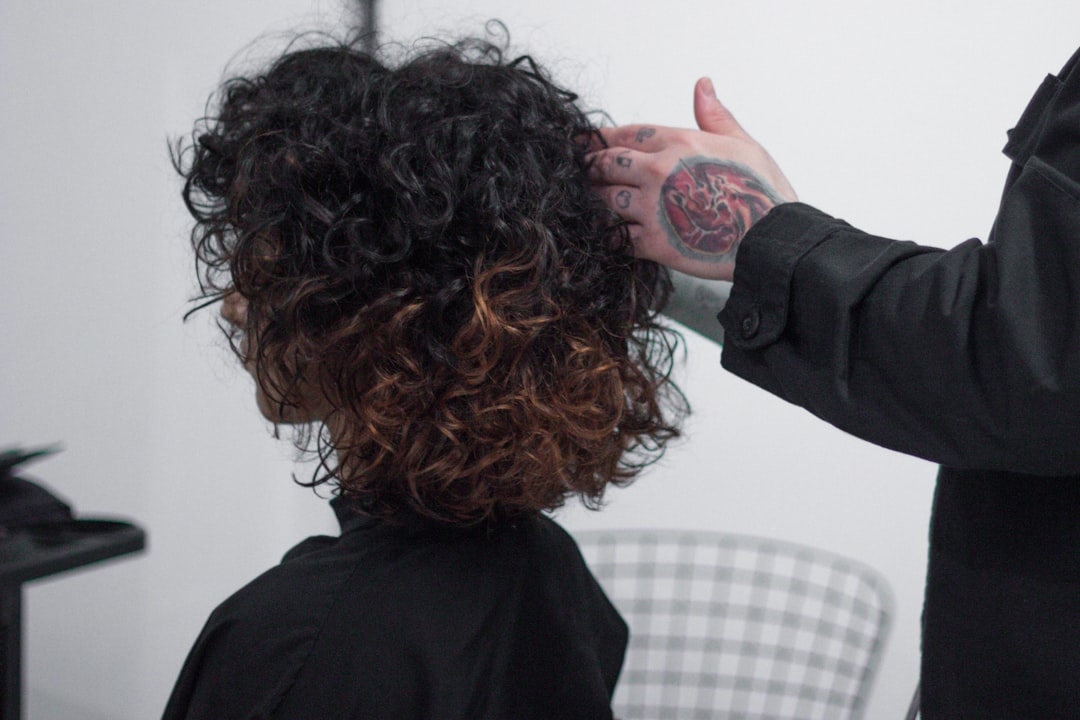
Step 3: The Head-Flip and Wrap
Flip your head forward (bending at the waist). Let your curly hair fall down. Place the fabric across your neck, then pull the fabric up and wrap it around your head like a turban. Secure the ends by twisting them together at the front, tucking them under, or using the elastic if it’s a designed microfibre wrap.
The key: your curls are now pointing downward (following gravity) and wrapped gently in soft fabric. There’s no friction; the fabric simply sits there absorbing moisture.
Step 4: Sit and Wait
Leave the plop on for 10–20 minutes depending on hair thickness and fabric absorbency. Microfibre typically requires 10–15 minutes; cotton t-shirts need 15–20 minutes. During this time, you can do other tasks (makeup, breakfast, answering emails). This is why plopping fits into morning routines easily.
Step 5: Unwrap Gently
Carefully unwrap the fabric. Your hair should be damp but not dripping. Unwrap slowly to avoid disturbing curl clumps. If you’re rough unwrapping, you undo plopping benefits.
Step 6: Air-Dry or Diffuse
Let hair finish air-drying, or use a diffuser attachment on low-to-medium heat for 15–30 minutes. Don’t use a regular blow-dryer nozzle, which disrupts curls. If air-drying, this takes 1–3 hours depending on porosity and length. Most people air-dry the remainder since curls are already partially set.
Common Mistakes When Plopping
Mistake 1: Plopping Damp Hair (Not Wet)
If you plop hair that’s already partially dry, it won’t set properly. Plop immediately after product application while hair is soaking wet. Water activates curl. Once water evaporates without proper setting, curl doesn’t form correctly.
Mistake 2: Plopping Too Long
Leaving fabric on for more than 20 minutes can cause creasing or temporary loss of definition at the fabric contact points. Plop just long enough for significant moisture absorption (10–20 minutes), then unwrap. Your hair will finish drying within an hour whether you plop 10 or 40 minutes.
Mistake 3: Plopping Too Tightly
Wrapping the fabric too tightly flattens curls and creates creases. Wrap snugly but not tightly. Your scalp should feel comfortable pressure, not tension. Loose wrapping works almost as well as tight wrapping—the absorption matters more than tension.
Mistake 4: Using Regular Towels
Thick, plush towels (meant for body drying) aren’t ideal because they’re heavy and create friction. This is why microfibre or t-shirts outperform regular towels. A lightweight kitchen towel also works if you don’t have alternatives.
Regional Variations in Plopping Practice
In warmer regions (southern UK, Mediterranean climate), plopping works faster because ambient warmth aids evaporation. You might plop for only 8–10 minutes. In cooler regions (Scotland, northern England), moisture evaporation is slower; plop for the full 15–20 minutes. Winter plopping takes longer than summer plopping in any region.
Some stylists in London and Southeast England recommend plopping indoors near a window for light warmth without direct sun. Northern climates often skip this and just plop in a regular room. Both approaches work; warmth simply speeds the process.
Plopping vs. Other Drying Methods: Comparison
Plopping (10–20 minutes active wrapping, then air-dry or diffuse)
Results: Highly defined curls with minimal frizz. Time investment: 25–90 minutes total depending on air-drying vs. diffusing. Effort: Low (mostly hands-off). Cost: One-time fabric purchase (£3–8). Best for: Most curl types, especially wavy to curly hair that frizzes with friction.
Towel Rubbing (Traditional Method)
Results: Frizzy, undefined curls. Time investment: 5–10 minutes. Effort: Low. Cost: Free (using existing towel). Best for: None—inferior to all other methods.
T-Shirt Scrunching (No Wrapping, Just Squeezing)
Results: Decent definition, moderate frizz, faster than plopping. Time investment: 10–15 minutes. Effort: Moderate (active scrunching). Cost: Free. Best for: Impatient people or those with very tight curls that dry fast.
Blow-Drying with Diffuser (Fast Option)
Results: Very defined, minimal frizz if technique is good. Time investment: 30–60 minutes. Effort: Moderate. Cost: Blow-dryer if you don’t have one (£20–100). Best for: People with thick curls who dry slowly or need speed.
A Reader’s Journey
Jasmine from Bristol spent years blow-drying her curls straight before learning about her natural curl pattern. “My hair was always frizzy and undefined. I thought my curls were just bad,” she explains. After discovering plopping through a curly-hair Facebook group, she switched her routine. “The first time I plopped for 15 minutes and let my hair air-dry, I couldn’t believe the definition. I looked in the mirror and thought I had different hair.” Three years later, plopping is her non-negotiable routine. “On days I skip plopping and use a towel, my hair immediately reverts to frizz. It’s clearly the make-or-break step for me.”
Combining Plopping with Other Curly-Hair Techniques
Finger Coiling Before Plopping
While product is applied to soaking-wet hair, manually coil sections around your finger. This encourages curl definition. Then plop. The combination produces noticeably tighter, more defined curls than plopping alone.
Praying Hands Method Before Plopping
Apply gel between wet palms, then smooth it onto sections of curly hair. This helps define curl without frizz. Then plop. This hybrid approach combines product distribution with plopping benefits.
Plopping Twice
Some people with very damp thick hair plop once for 15 minutes, then plop again for another 10. The second plop finishes moisture absorption. This doubles time but ensures thorough drying before air-drying/diffusing phase.
Maintaining Your Plopping Fabric
Wash your microfibre towel or t-shirt weekly in warm water with regular laundry detergent. Microfibre lasts 2–3 years with normal washing. Avoid fabric softener, which reduces absorbency. T-shirts last indefinitely but may pill over years of use (completely harmless).
FAQ
How long should you plop curly hair?
10–20 minutes depending on hair thickness and fabric type. Microfibre needs less time (10–15 minutes); cotton t-shirts need more (15–20 minutes). Thicker hair with higher porosity absorbs water faster and can plop for shorter duration. Finer, less porous hair benefits from full 20 minutes.
Can you plop for too long?
Beyond 20–25 minutes, minimal additional benefit occurs and risk of creasing increases. Aim for 15–20 minutes as the sweet spot. More than this doesn’t improve results noticeably.
Do you plop before or after leaving-in conditioner?
Apply leave-in conditioner first, then plop. The conditioner remains in your hair throughout plopping and helps define curls. You don’t rinse it out—that’s the point of “leave-in” conditioner.
Is plopping necessary or optional?
Technically optional, but dramatically improves curl definition and reduces frizz. If you’re getting frizzy curls currently, plopping is the single most impactful change you can make. If your curls look great already, you might skip it, but most people benefit.
Can you plop straight hair?
Plopping works for wavy to curly hair. Straight hair doesn’t benefit because it lacks curl pattern to set. Plopping won’t damage straight hair, but it won’t improve it either.
Your Plopping Routine
Get a microfibre towel (£3–8) or designate an old t-shirt as your plopping fabric. On wash days, apply products to soaking-wet hair immediately after shampooing, plop for 15 minutes while you do other things, then unwrap and air-dry or diffuse. This single change—replacing towel-rubbing with plopping—transforms curl quality for most people. Your curls are probably already more defined than you realise; you’re simply been drying them in a way that destroys definition. Plopping releases what’s already there.
Add Comment